I just love small utility apps that sit in my mac’s menubar and provide some useful functionality. I recently updated to Yosemite beta and found the awesome ‘Dark Mode’. Since I also use a dark theme in Xcode while coding, this felt perfect. To switch on the Dark mode, there is a setting under System Prefences-> General -> Theme. Or you can enter commands in Terminal. Hmmmm… really?? Can’t I just have a switch in the menubar? Yes you can, but you have to build it yourself. (or just download it from here) So lets build a menubar app that you click once to switch to Dark Mode and again to go back to the loser mode :P (I am not a OS X developer, so my code might not be optimal, but dammit it gets the work done) Create a new Xcode project: 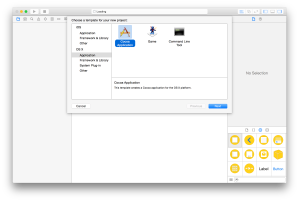 Start by creating a new project, under OS X, select Application -> Cocoa Application Next, give it a cool name.
 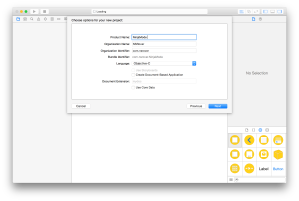 And there you have your mac app, run it!
 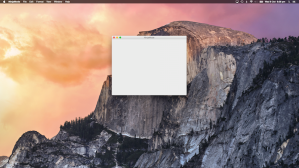 So here we have an app that shows a blank window and a menu but no menubar item, exactly the opposite of what we wanted, great! Delete the menu and window Open the MainMenu.xib and delete the NSMenu and NSWindow that we don’t need.
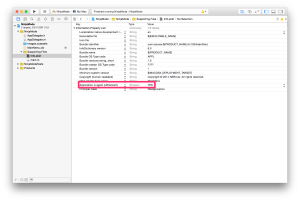
 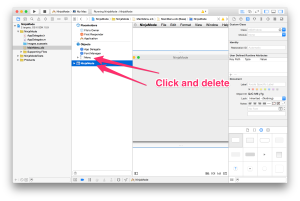 Run the app again. Declare as agent Better… but we still want to get rid of the dock icon and the Menu. To do this we need to define our app as an “agent”. Open the Info.plist file and add a row. The key is “Application is agent (UIElement)” and change its value to YES.
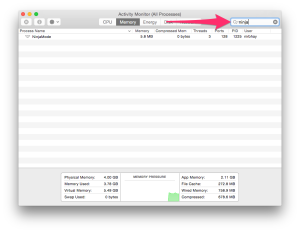
  NOW run the app! Where is the app? To be sure the app is actually running you can check it in the activity monitor -> search for your app name. There it is, ninjamode indeed.
  Ok so now we want to have a little button in the menubar that our app can get user input from. First things first, we need a great icon. The icon can be a png file, you can get something free from flaticon.com, or just use this for now. You might need to resize your icon to fit into the menubar, a height of around 20 should be fine. Add the png to your project. Create the button Now we need to create the button itself. Open the AppDelegate.m. The interface will already have a property called window. We will need a couple more:
 @property (strong, nonatomic) NSStatusItem *statusItem; @property (assign, nonatomic) BOOL darkModeOn; The ‘statusItem’ is the menu button itself and the boolean ‘darkModeOn’ is used to keep track of the current mode. In the ‘applicationDidFinishLaunching’ lets add the code to create a button and add it to the menu bar. self.statusItem = [[NSStatusBar systemStatusBar] statusItemWithLength:NSVariableStatusItemLength]; _statusItem.image = [NSImage imageNamed:@"switchIcon.png"]; The first line requests a ’NSStatusItem’ from the systemStatusBar. In the second line we provide an image to this button. Run the app now. 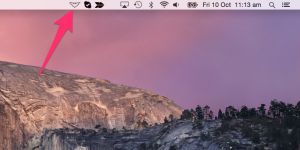 Capture the click So there we have it, our apps button sitting with the system menubar items. Next lets capture the button click event. Add this code in ‘applicationDidFinishLaunching’ method.
 [_statusItem setAction:@selector(itemClicked:)]; We will also need to implement its selector: - (void)itemClicked:(id)sender { NSAlert * alert = [NSAlert alertWithMessageText:@"Bat signal acknowledged" defaultButton:@"Alright!" alternateButton:nil otherButton:nil informativeTextWithFormat:@"NSStatusItem was clicked"]; [alert runModal]; } To quit the app we can use: [NSApp terminate:self]; (more on this later)
Get the complete code here: https://github.com/nirbhayg/NinjaMode/tree/master
This is basically how you create a menubar only app. In rest of the post we write code to implement the Yosemite’s Dark mode switch. We will need a method to determine what the current mode is: - (void)refreshDarkMode { NSString * value = (__bridge NSString *)(CFPreferencesCopyValue((CFStringRef)@"AppleInterfaceStyle", kCFPreferencesAnyApplication, kCFPreferencesCurrentUser, kCFPreferencesCurrentHost)); if ([value isEqualToString:@"Dark"]) { self.darkModeOn = YES; } else { self.darkModeOn = NO; } } CFPreferencesCopyValue is a function for reading some system preferences value. We use it to find the value for key ‘AppleInterfaceStyle’ which tells us wether the current mode is Dark or Light. We will call this and the end of the applicationDidFinishLaunching method to get the current state. [self refreshDarkMode]; Next we need to replace the code under itemClicked: method to actually switch the mode. - (void)itemClicked:(id)sender { _darkModeOn = !_darkModeOn; //Change pref if (_darkModeOn) { CFPreferencesSetValue((CFStringRef)@”AppleInterfaceStyle”, @”Dark”, kCFPreferencesAnyApplication, kCFPreferencesCurrentUser, kCFPreferencesCurrentHost); } else { CFPreferencesSetValue((CFStringRef)@”AppleInterfaceStyle”, NULL, kCFPreferencesAnyApplication, kCFPreferencesCurrentUser, kCFPreferencesCurrentHost); } //update listeners dispatch_async(dispatch_get_main_queue(), ^{ CFNotificationCenterPostNotification(CFNotificationCenterGetDistributedCenter(), (CFStringRef)@”AppleInterfaceThemeChangedNotification”, NULL, NULL, YES); }); } We start by toggling the darkMode. Then depending on its value, we either set AppleInterfaceStyle to Dark or NULL. We use the CFPreferencesSetValue function to accomplish this. After we are done updating the value we need to notify all the interested listeners, in this case the OS itself. We use CFNotificationCenterPostNotification to do this. Now our app is functional. But there are still a couple of things missing. Firstly, you will notice that the icon does not look quite right in dark mode. So add this line after we provide image to our statusItem: [_statusItem.image setTemplate:YES]; This tells the OS that the image contains only black and clear pixels. This allows OS to make changes to this image.  Second thing we need is a way to quit the app. Since our app does not have a menu or a dock icon, it is difficult for the user to quit the app. One way they can do it is through Activity Monitor. Additionally we will allow the user to quit the app on a command-click. Inside the itemClicked: method add these lines at the top:
 NSEvent *event = [NSApp currentEvent]; if([event modifierFlags] & NSControlKeyMask) { [[NSApplication sharedApplication] terminate:self]; return; } Ok the app is basically ready for use. To export the app you can do Product -> Archive. Alternatively you can open the Products directory in Finder and copy the app from there.
Thanks!
Great!
can you please update for swift?
Since the bat-icon is not found in dropbox, get it here:

Well done!! Had some problems using CFPreferencesCopyValue, had to use CFPreferencesCopyAppValue in stead. The docs pointed me in that direction.